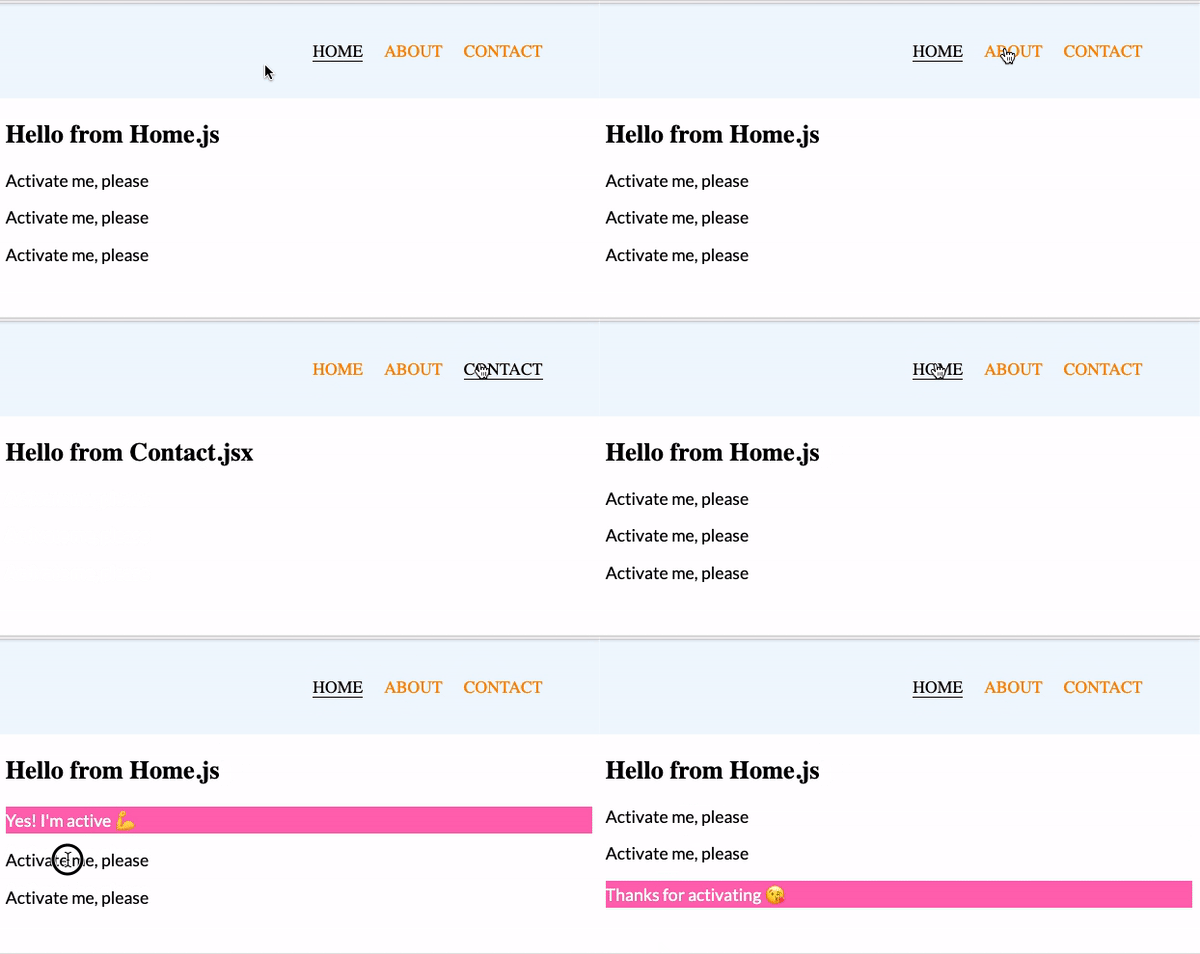
Hello again! I like to keep my promises — that is why in this quick tip, I will present a way to render different components when you click/chose a specific option from navigation.
Just like before (<— Quick Tips: using forwardRef to measure element height dynamically), I will use and extend our previous example to demonstrate a different content for a different view (Home, About, Contact).
We will modify only the App component.
The first step — create required components
Home component
import React, { useState } from "react";
import ActiveClass from "../ActiveClass";

const textData = [
  {
    id: 1,
    text: "Yes! I'm active 💪"
  },
  {
    id: 2,
    text: "My turn now 🤠"
  },
  {
    id: 3,
    text: "Thanks for activating 😘"
  }
];

const Home = () => {
  const [activeId, setActiveId] = useState(null);

  const handleClick = id => () => {
    const activeElement = textData.find(item => item.id === id);

    activeElement && setActiveId(id);
    console.log(activeElement.id);
  };

  return (
    <div>
      <h2>Hello from Home.jsx</h2>
      <ActiveClass
        data={textData}
        onClick={handleClick}
        activeId={activeId} />
    </div>
  );
};

export default Home;
It holds the logic for the active class component from my first quick tip (<— Quick Tips: add and remove active style).
ActiveClass component
import React from "react";

const activeStyle = {
  background: "hotpink",
  color: "white"
};

const ActiveClass = ({ data, onClick, activeId }) => {
  return data.map(({ id, text }) => {
    return (
      <p
        style={id === activeId ? activeStyle : {}}
        key={id}
        onClick={onClick(id)}
      >
        {id === activeId ? text : "Activate me, please"}
      </p>
    );
  });
};

export default ActiveClass;
About component
import React from 'react';

const About = ()=> {
  return <h2>Hello from About.jsx</h2>
}

export default About;
Contact component
import React from 'react';

const Contact = ()=> {
  return <h2>Hello from Contact.jsx</h2>
}

export default Contact;
The second step — add function with the switch statement
const pageContent = () => {
    switch (activeNavOption) {
      case "home":
        return <Home />;
        break;
      case "about":
        return <About />;
        break;
      case "contact":
        return <Contact />;
        break;
      default:
        return;
    }
  };
This will allow us to render a different component base on ‘activeNavOption’ state.
The third step — call pageContent function in the main tag
<main>{pageContent()}</main>I had replaced <p>Hello! I’m in container under fixed navigation</p> with <main>{pageContent()}</main>.
And that is it, you can render components base on a chosen navigation option.
App component
import React, { useEffect, useState, useRef, useCallback } from "react";
import { render } from "react-dom";
import Hello from "./components/Hello";
import Navigation from "./components/Navigation";
import { About, Contact, Home } from "./components/pages";
import "./style.css";

const App = () => {
  const [activeNavOption, setActiveNavOption] = useState("home");
  const [navigationHeight, setNavigationHeight] = useState(undefined);
  const navigation = React.createRef();

  useEffect(() => {
    setNavigationHeight(navigation.current.offsetHeight);
  }, []);

  const pageContent = () => {
    switch (activeNavOption) {
      case "home":
        return <Home />;
        break;
      case "about":
        return <About />;
        break;
      case "contact":
        return <Contact />;
        break;
      default:
        return;
    }
  };

  const handleNavOptionClick = useCallback(
    event => {
      console.log('I was called');
      const navOptionName = event.target.getAttribute("data-name");
      setActiveNavOption(navOptionName);
  },
  [activeNavOption]
  );

  return (
    <>
      <Navigation
        ref={navigation}
        currentOption={activeNavOption}
        handleNavOptionClick={handleNavOptionClick}
      />
      <div style={{ marginTop: `${navigationHeight + 20}px` }}>
        <main>{pageContent()}</main>
      </div>
    </>
  );
};

render(<App />, document.getElementById("root"));
Small inclusion.
Normally, when building applications with navigation we would use React Router to accomplish rendering of different components based on routes, but this tip gives you the skill to do that for components not related to browser URL.
