Creating CRUDs in applications (both web and desktop) is something that will happen sooner or later in every developer's life. But wait! What is a CRUD? Today, I'm going to show you how to implement Create, Read, Update and Delete operations with GraphQL and React.
Preparation
First of all, we need to create a basic React application we are going to work on. To do this, we will use create-react-app. Go to the Getting Started page of this tool and create a new React application with one of the methods described there. After that, we need to clean up the project structure: in src folder I suggest to leave only index.js file with the following content:
import React from 'react';
import ReactDOM from 'react-dom';

ReactDOM.render(
  <React.StrictMode>
      <h1>Simple GraphQL client</h1>
  </React.StrictMode>,
  document.getElementById('root')
);
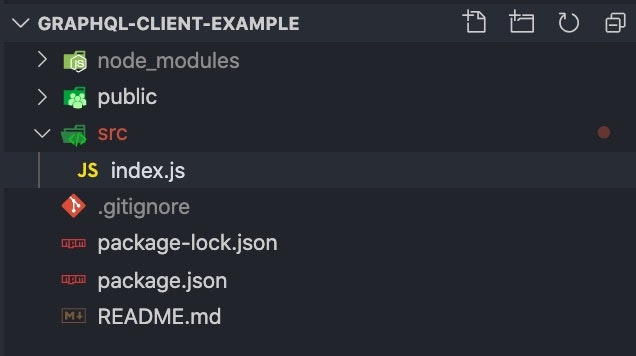
Remove other files related to tests and so on. This is our base that we’re going to work on from this moment. Your project structure should look like this:
The last thing we should do before putting any code in any file, is to install all the necessary npm packages. We’re going to use a very simple and popular package called Apollo. Let's do this with the following command: npm install apollo-boost @apollo/react-hooks graphql
Now, we’re ready to jump into the code!
Implementing GraphQL client
The first thing is to implement Apollo client and inject it to the application. We can do that by implementing the following lines of code in index.js file.
import ApolloClient from 'apollo-boost';

const client = new ApolloClient({
  uri: 'http://localhost:8050'
});
Now, we need to pass it to the application by wrapping it with Apollo provider. So the whole index.js file will look like this:
import React from 'react';
import ReactDOM from 'react-dom';
import ApolloClient from 'apollo-boost';
import { ApolloProvider } from '@apollo/react-hooks';

const client = new ApolloClient({
  uri: 'http://localhost:8050'
});

ReactDOM.render(
  <React.StrictMode>
    <ApolloProvider client={client}>
      <h1>Simple GraphQL client</h1>
    </ApolloProvider>
  </React.StrictMode>,
  document.getElementById('root')
);
And that's all! With this very basic setup, we can start using the amazing power of GraphQL! Why is it amazing? Well, I have to ask you now to go to the Dominik's article about implementing GraphQL on server side. He's explaining there the differences between GraphQL and REST approaches. You don't need to read whole article, but at the end of it there is a link to his repository with a simple server. We will use his code to run the server locally and call it with our client application here. And yes - localhost:8050 is actually calling the server created by Dominik. I highly recommend to clone his repository to your computer and run it before we jump into the next steps: queries and mutations!
Querying for data with GraphQL
Let's start with something simple - listing data from server. We need to create the first component called UsersList. I prefer to use components folder to hold all the components in the application. UsersList component will contain this piece of code:
import React from 'react';
import { useQuery } from '@apollo/react-hooks';
import { gql } from 'apollo-boost';

const USERS_QUERY = gql`{
  users {
    id
    firstname
    lastname
  }
}`;

const UsersList = ()=> {
  const { loading, error, data } = useQuery(USERS_QUERY);

  if (loading) return <p>Loading...</p>;
  if (error) return <p>Error...</p>;

  return <ul>
      {data.users.map(({ id, firstname, lastname })=> <li key={id}>
        {firstname} {lastname}
      </li>)}
    </ul>;
}

export default UsersList;
Let's go through this code line by line.
The first step is importing useQuery hook from @apollo/react-hooks and import gql from apollo-boost. Because this component is functional component we are going to use hook provided by Apollo package. USERS_QUERY is actual GraphQL query we need to pass to useQuery hook. Let's stop right here for a while.
What exactly this piece of code is doing? We’re wrapping GraphQL query with the gql function, which is then passed to useQuery hook. The hook is called once the component is getting rendered by the application. If you are not familiar with GraphQL syntax, I need to explain you this first:
{
  users {
    id
    firstname
    lastname
  }
}
If you know SQL language, this GraphQL query is something similar to: select id, firstname, lastname from users. Basically, we’re 'telling' GraphQL client that we want to take all the users from database (on server side, it's a schema defined there, which usually refers to the actual database table), but we are interested only in the three fields: id, firstname, and lastname. Because we’ve already implemented client and passed URL to it, useQuery hook 'knows' where to pass this query. What's worth to notice here: it's a simplified version of the query, more complex one will come further in the article. Ok, let's move on...
At the very beginning of the components, we can see the usage of the imported hook. A very helpful aspect here is that the hook returns:
- loading - which is useful when query is being processed at the moment
- error - when query couldn't be processed successfully
- data - which contains data returned by server
The rest of code should be clear for you - it's a very simple implementation of loading and error handling. If nothing bad happened, we can list our users - I choose here a simple unordered list. Inside the data object, we have the access to users in an exact form as in provided query.
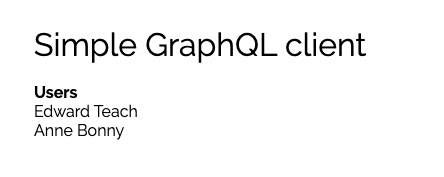
Wait, but why is my view looking little bit different than yours? - you might ask. The answer is that I just simplified it in this article, but an actual code contains also my beloved styled-components with a little styling already implemented. I put the link to the repository at the end of this article, so don’t worry about this now!
Passing arguments to query
We already know how to query for all data in a single schema. But a common scenario is also to query for details of a single entity using its identification number (usually database id). We can do this using two different approaches depending on your needs. If we would like to call the query manually within the same component when someone clicks on the User’s name - we couldn’t do that using useQuery since this hook is called on the component's render phase. In such a scenario, it’d be much more useful to use the useLazyQuery hook, which basically lets us decide when to call for data. In this article, we'll go with a simpler approach.
In our scenario, we would like to know the details about our users, so we need to implement a simple component called UserDetails and put it just below the list in UsersList. Here is the full content of this component:
import React from 'react';
import { gql } from 'apollo-boost';
import { useQuery } from '@apollo/react-hooks';

const GET_USER = gql`
  query GetUser($id: String!) {
    user(id: $id) {
      firstname
      lastname
      nickname
      email
    }
  }
`;

const UserDetails = ({ id }) => {
  const { data } =  useQuery(GET_USER, { variables: { id }});

  if (data && data.user) {
    const { user: { firstname, lastname, nickname, email }} = data;
    return <Wrapper>
      <h2>Details</h2>
      <p>Name: {firstname} {lastname}</p>
      <p>Nickname: {nickname}</p>
      <p>E-mail: {email}</p>
    </Wrapper>;
  }

  return null;
}

export default UserDetails;
I want to focus now on the query because it’s changed its shape a little bit.
query User($id: String!) {
  user(id: $id) {
    firstname
    lastname
    nickname
    email
  }
}
As you can see, the query starts with the text query (operation type) and the query's name (operation name). The argument that this particular query can accept - argument's type (String) and an exclamation mark at the end of the type means the parameter is required. As a name you can use whatever you want, but remember to keep things clear and self-described. In the second line, it looks almost the same as the query for all Users, but we are passing id as a parameter. Again, if you know SQL syntax it would be something like this: select firstname, lastname, nickname, email from users where id='id passed'.
Another change in comparison to the previous usage of useQuery is that we’re passing the additional options parameter which contains variables we want to use. Id is passed to the component when someone clicks on User from UsersList. Variables are passed to the query and used when calling backend.
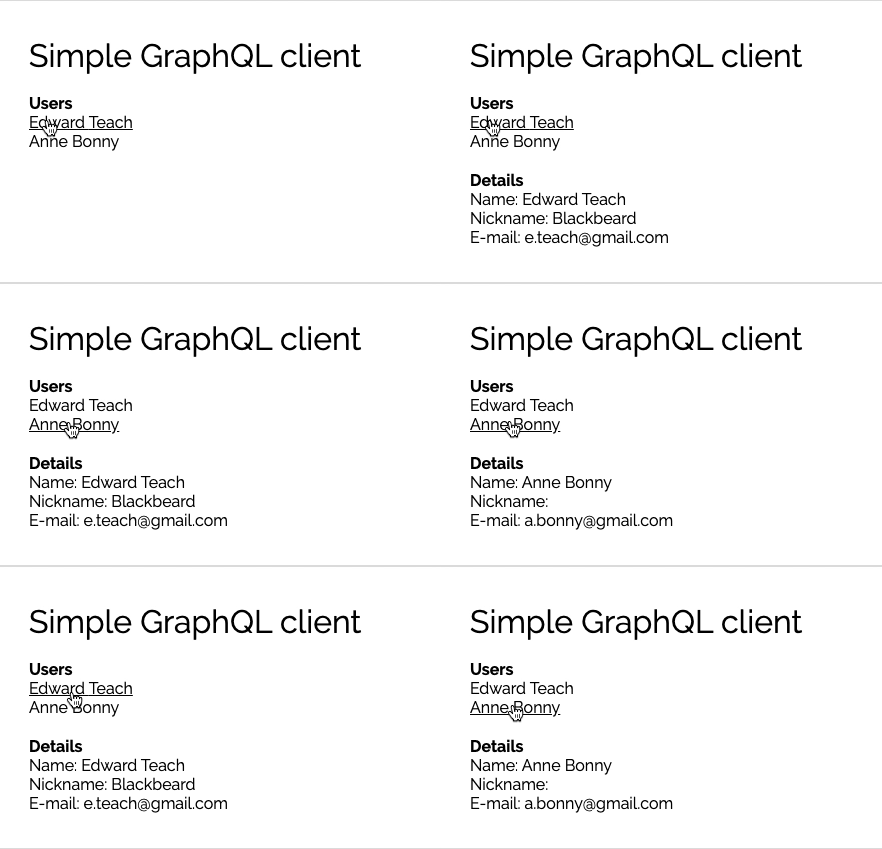
The result of this code is:
Creating new users with mutations
So far, we’ve learnt about calling backend for a data with queries. Now, we would like to mess a little bit with them, but for this we need to use mutations. Let's create a simple form for our data. We can create another component in a separated file called UserForm and import it in the main index.js file before list of users. Here is the full code:
import React, { useState } from 'react';

const UserForm = ()=> {
  const [user, setUser] = useState({});

  const handleOnChange = (event)=> {
    setUser({ ...user, [event.target.name]: event.target.value});
  }

  const handleSubmit = (event)=> {
    // TODO: we need to call backend here!
    event.preventDefault();
  }

  return <form onSubmit={handleSubmit}>
    <label>
      First name:
      <input onChange={handleOnChange} type="text" name="firstname" />
    </label>
    <label>
      Second name:
      <input onChange={handleOnChange} type="text" name="secondname" />
    </label>
    <label>
      Nickname:
      <input onChange={handleOnChange} type="text" name="nickname" />
    </label>
    <label>
      Email:
      <input onChange={handleOnChange} type="text" name="email" />
    </label>
    <input type="submit" value="Create" />
  </form>;
}

export default UserForm;
I used useState hook to keep the provided data. Every time user provides data in inputs, handleOnChange function will update the state. As you can see, in the handleSubmit function, we still need to do some work. We have to do these three things:
- Create mutation query
- Use useMutation hook
- Call it when someone clicks submit button
Regarding the number one point - here is the whole mutation for creating new User:
const CREATE_USER = gql`
  mutation CreateUser($firstname: String!, $lastname: String!, $nickname: String!, $email: String!, $password: String!) {
    createUser(
      data: {
        firstname: $firstname,
        lastname: $lastname,
        nickname: $nickname,
        email: $email,
        password: $password
      }
    ) {
      id
    }
  }
`;
Let's take a closer look at this. We don't use query anymore here, and instead of this we use mutation as an operation type. CreateUser is an operation name and we pass a bunch of variables to it. All of them are required by backend (which is described in Dominik's GitHub repository). Then we call createUser with a data object that consists of variables passed to the mutation. In a simpler form, there’s no data but it's a good practice to do this on the server-side when defining schemas. What id is doing at the end of the mutation? Well, you can define here what should be returned by the server if everything goes smoothly.
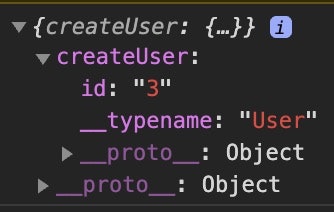
The points number 2 and 3 can be done with these lines of code:
const [createUser, { data }] = useMutation(CREATE_USER);

const handleSubmit = (event)=> {
  createUser({variables: { ...user }});
  event.preventDefault();
}
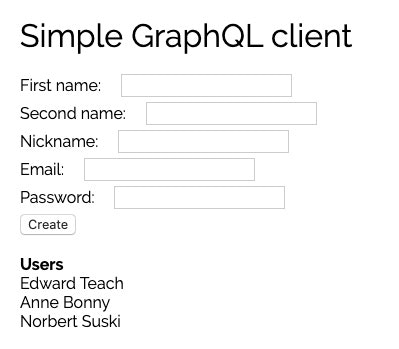
Of course, this is an extremely simple case and implementation - normally, you should implement validations, clear form, refresh the list of users after creating one (in GraphQL we can subscribe to changes, but this is a topic for a separate article), and use packages that simplify implementation of forms in React (like Formik or React Hook Form). But in this article, I wanted to focus on GraphQL. Maybe there will be another article about the mentioned packages, who knows! So, you can continue the work now, fill all the form fields, and click the Create button. Once you refresh the page, there should be a new User added to the list.
Updating data
Updating entities with mutations is very similar to creating a new one. The main difference is in the mutation itself — here is a mutation for update:
const UPDATE_USER = gql`
  mutation UpdateUser($id: String!, $firstname: String!, $lastname: String!, $nickname: String!, $email: String!, $password: String!) {
    updateUser(
      id: $id,
      data: {
        firstname: $firstname,
        lastname: $lastname,
        nickname: $nickname,
        email: $email,
        password: $password
      }
    ) {
      id
    }
  }
`;
The key difference here is that we need to pass id of the entity we want to update, but everything else stays the same.
Deleting data
Mutations can also be used to remove data. Let's implement a simple deletion mechanism in the application. A surprising thing is that we already know everything to do this step, because we still should use the useMutation hook and query for deletion will be very simple. I implemented this functionality in the UserDetails components, so whenever someone clicks on the user, apart from the details, there will also be a delete button.
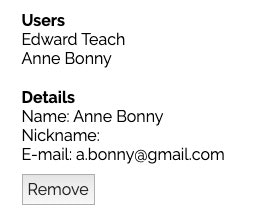
What the mutation looks like?
const DELETE_USER = gql`
  mutation DeleteUser($id: String!){
    deleteUser(id: $id)
  }
`;
We have to pass id of the User we want to delete only. The button should handle onClick event which looks like this:
const [deleteUser] = useMutation(DELETE_USER);

const handleOnClick = ()=> {
  deleteUser({ variables: { id }});
}
So the whole UserDetails component looks like this:
import React from 'react';
import { gql } from 'apollo-boost';
import { useQuery, useMutation } from '@apollo/react-hooks';

const GET_USER = gql`
  query GetUser($id: String!) {
    user(id: $id) {
      firstname
      lastname
      nickname
      email
    }
  }
`;

const DELETE_USER = gql`
  mutation DeleteUser($id: String!){
    deleteUser(id: $id)
  }
`;

const UserDetails = ({ id }) => {
  const { data } =  useQuery(GET_USER, { variables: { id }});
  const [deleteUser] = useMutation(DELETE_USER);

  const handleOnClick = ()=> {
    deleteUser({ variables: { id }});
  }

  if (data && data.user) {
    const { user: { firstname, lastname, nickname, email }} = data;
    return <div>
      <h2>Details</h2>
      <p>Name: {firstname} {lastname}</p>
      <p>Nickname: {nickname}</p>
      <p>E-mail: {email}</p>
      <button onClick={handleOnClick}>Remove</button>
    </div>;
  }

  return null;
}

export default UserDetails;
Summary
While using GraphQL, we went through all the CRUD operations: Create, Read, Update, Delete. As you can see, it's quite simple and fast to implement, and easy to use. Dominik had already explained why GraphQL can be a better choice than REST in some scenarios in the previous article. I'm using GraphQL on a daily basis in every project that we implement using Gatsby (which is another brilliant technology!). I know that we did a simple implementation only, but that's exactly why I want to encourage you to dive deeper into this topic, as you already has solid foundations!
Link to repo: https://github.com/norbertsuski/graphql-client-example
Apollo documentation: https://www.apollographql.com/docs/react/
